

The final part in our series of our restoration of a 1971 Mitsubishi Galant rally car.
Before prepping the car for painting, we took the car to our venue for some shake down and testing. It was a chance to make sure everything was performing as it should and bed in the new rings and bearings before its competition debut.
To begin with, the car was driven around checking gears, brakes and driveline to ensure nothing was out of order. Once we were confident there were no issues, the car was taken for longer casual laps around our stages. Every couple of laps, we’d bring the car in, check temperatures and have a good look over everything. So far so good.
 In the early evening we brought the car out to see how it would go driven in anger. Using one of our open areas, we set out a course and had a play. The owner was also able to find his feet with rear wheel drive, getting to grips with drifting the rear end. Rear wheel drive is a totally different style to front wheel drive when it comes to rally driving so it took a little while to understand the additional throttle needed to steer the car.
By the end of the test session we only had a couple of minor issues to sort. One was a tendency to get a bit warm when being worked hard, the second was a slightly “squishy” brake pedal.
Back in the workshop, the temperature issue was sorted by adding more timing advance that had been retarded for running in. 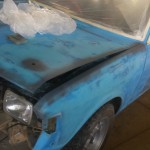 The brakes too were a simple issue. One of the fittings on the brake bias valve (something we hadn’t touched at all) had a very slight weep. Once tightened a little extra bleeding had the pedal firm.
When originally built the Galant had a good coat of light blue paint inside and out. After several owners, the paint was starting to look a little sad in a few spots, particularly around the bonnet and front guards.
The whole car was blocked back and prepped for a coat of paint.
The owner wanted something that stood out so the chosen colour was Acid Green. Just on 3 litres of the acrylic colour was applied to the body work and let cure for a few days. Following the paint, black coloured stone guard was applied to the lower  sections of the doors and sills to resist chipping.
The countdown was now on to the car re-entering rally service. The paint was cut back and polished before contrasting black vinyl stripes and a windscreen sticker were added by our sign writer Richard.
Aluminium brackets and HDPE mud flaps also found their way onto the car to comply with the rules and to add further body work protection. To finish off the exterior, all the wheels were given a coat of white paint before rolling on some 14” rally tyres.
Now completed, the car looked purposeful in rally trim. With the entry in and everything set, the Galant was ready to introduce a new generation to Clubman rallying.
You can read how the guys went at the Lewana Stages Rally here: https://rallyaction.com.au/lewana_2015/
If you’d like to start your own rally adventure, click here


