

It’s the one area where most people go wrong. Electrics. Considering how critical electrics are, it’s amazing how much poor wiring we see in rally cars. Everything from putting someone out of an event to an electrical fire waiting to happen! The Galant had just about the whole spectrum. [As a side note, we’ve seen plenty of bad wiring in normal road cars too, top of the list is stereo and amplifiers.]
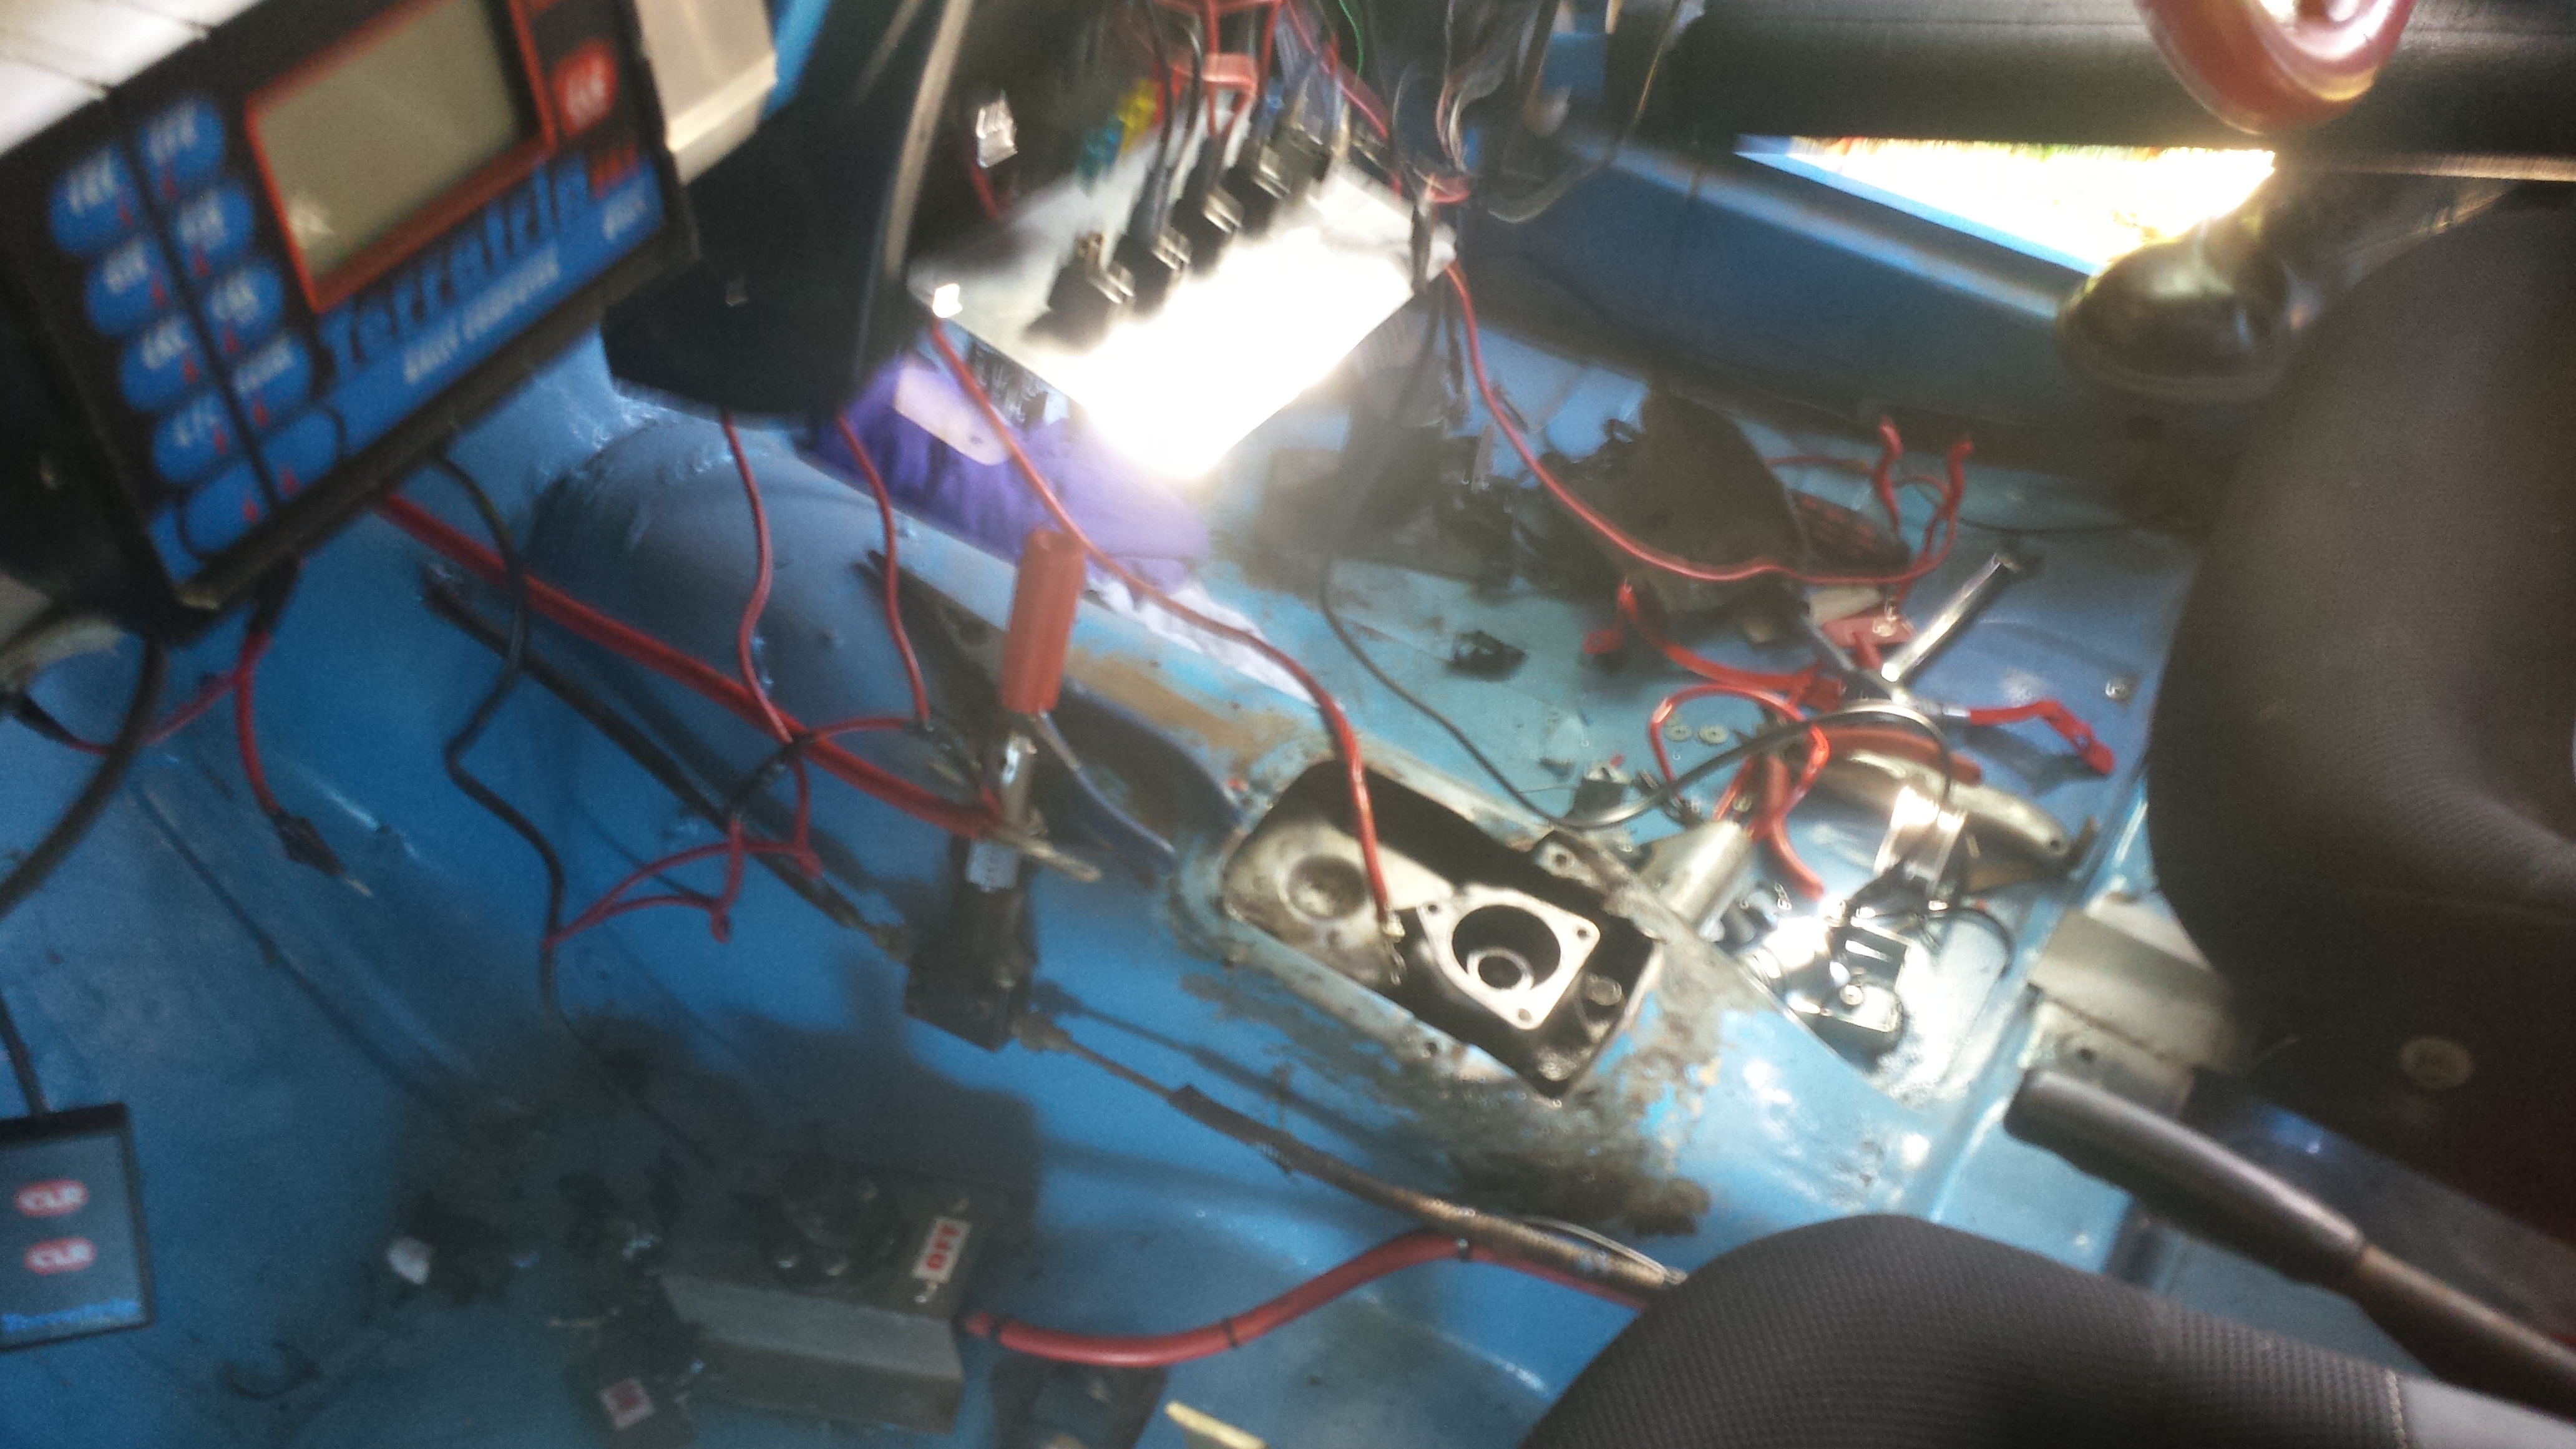 It was decided that the car would need close to a full re-wire to ensure it was safe and reliable on rallies.
With an old battery used simply to provide some power, each circuit was carefully identified, tested and labelled. We then had the task of separating the car’s standard electrics from the rally wiring (spotlights, intercom, trip computer etc) as everything was all matted together. Non essential and burnt out wiring was also removed helping to further simplify the loom.
Crucial circuits such as the ignition, starter and fuel pump were either thoroughly tested or re-wired and the terminations were soldered rather than crimped. Relays were added as required and the correct amperage wire was also fitted. The rally loom was completely remade and a pair of re-settable breakers mounted in the cabin rounded out the work. A new aluminium switch panel was fabricated and fitted in the centre of the dash along with a new blade type fuse box making for easy access on events.
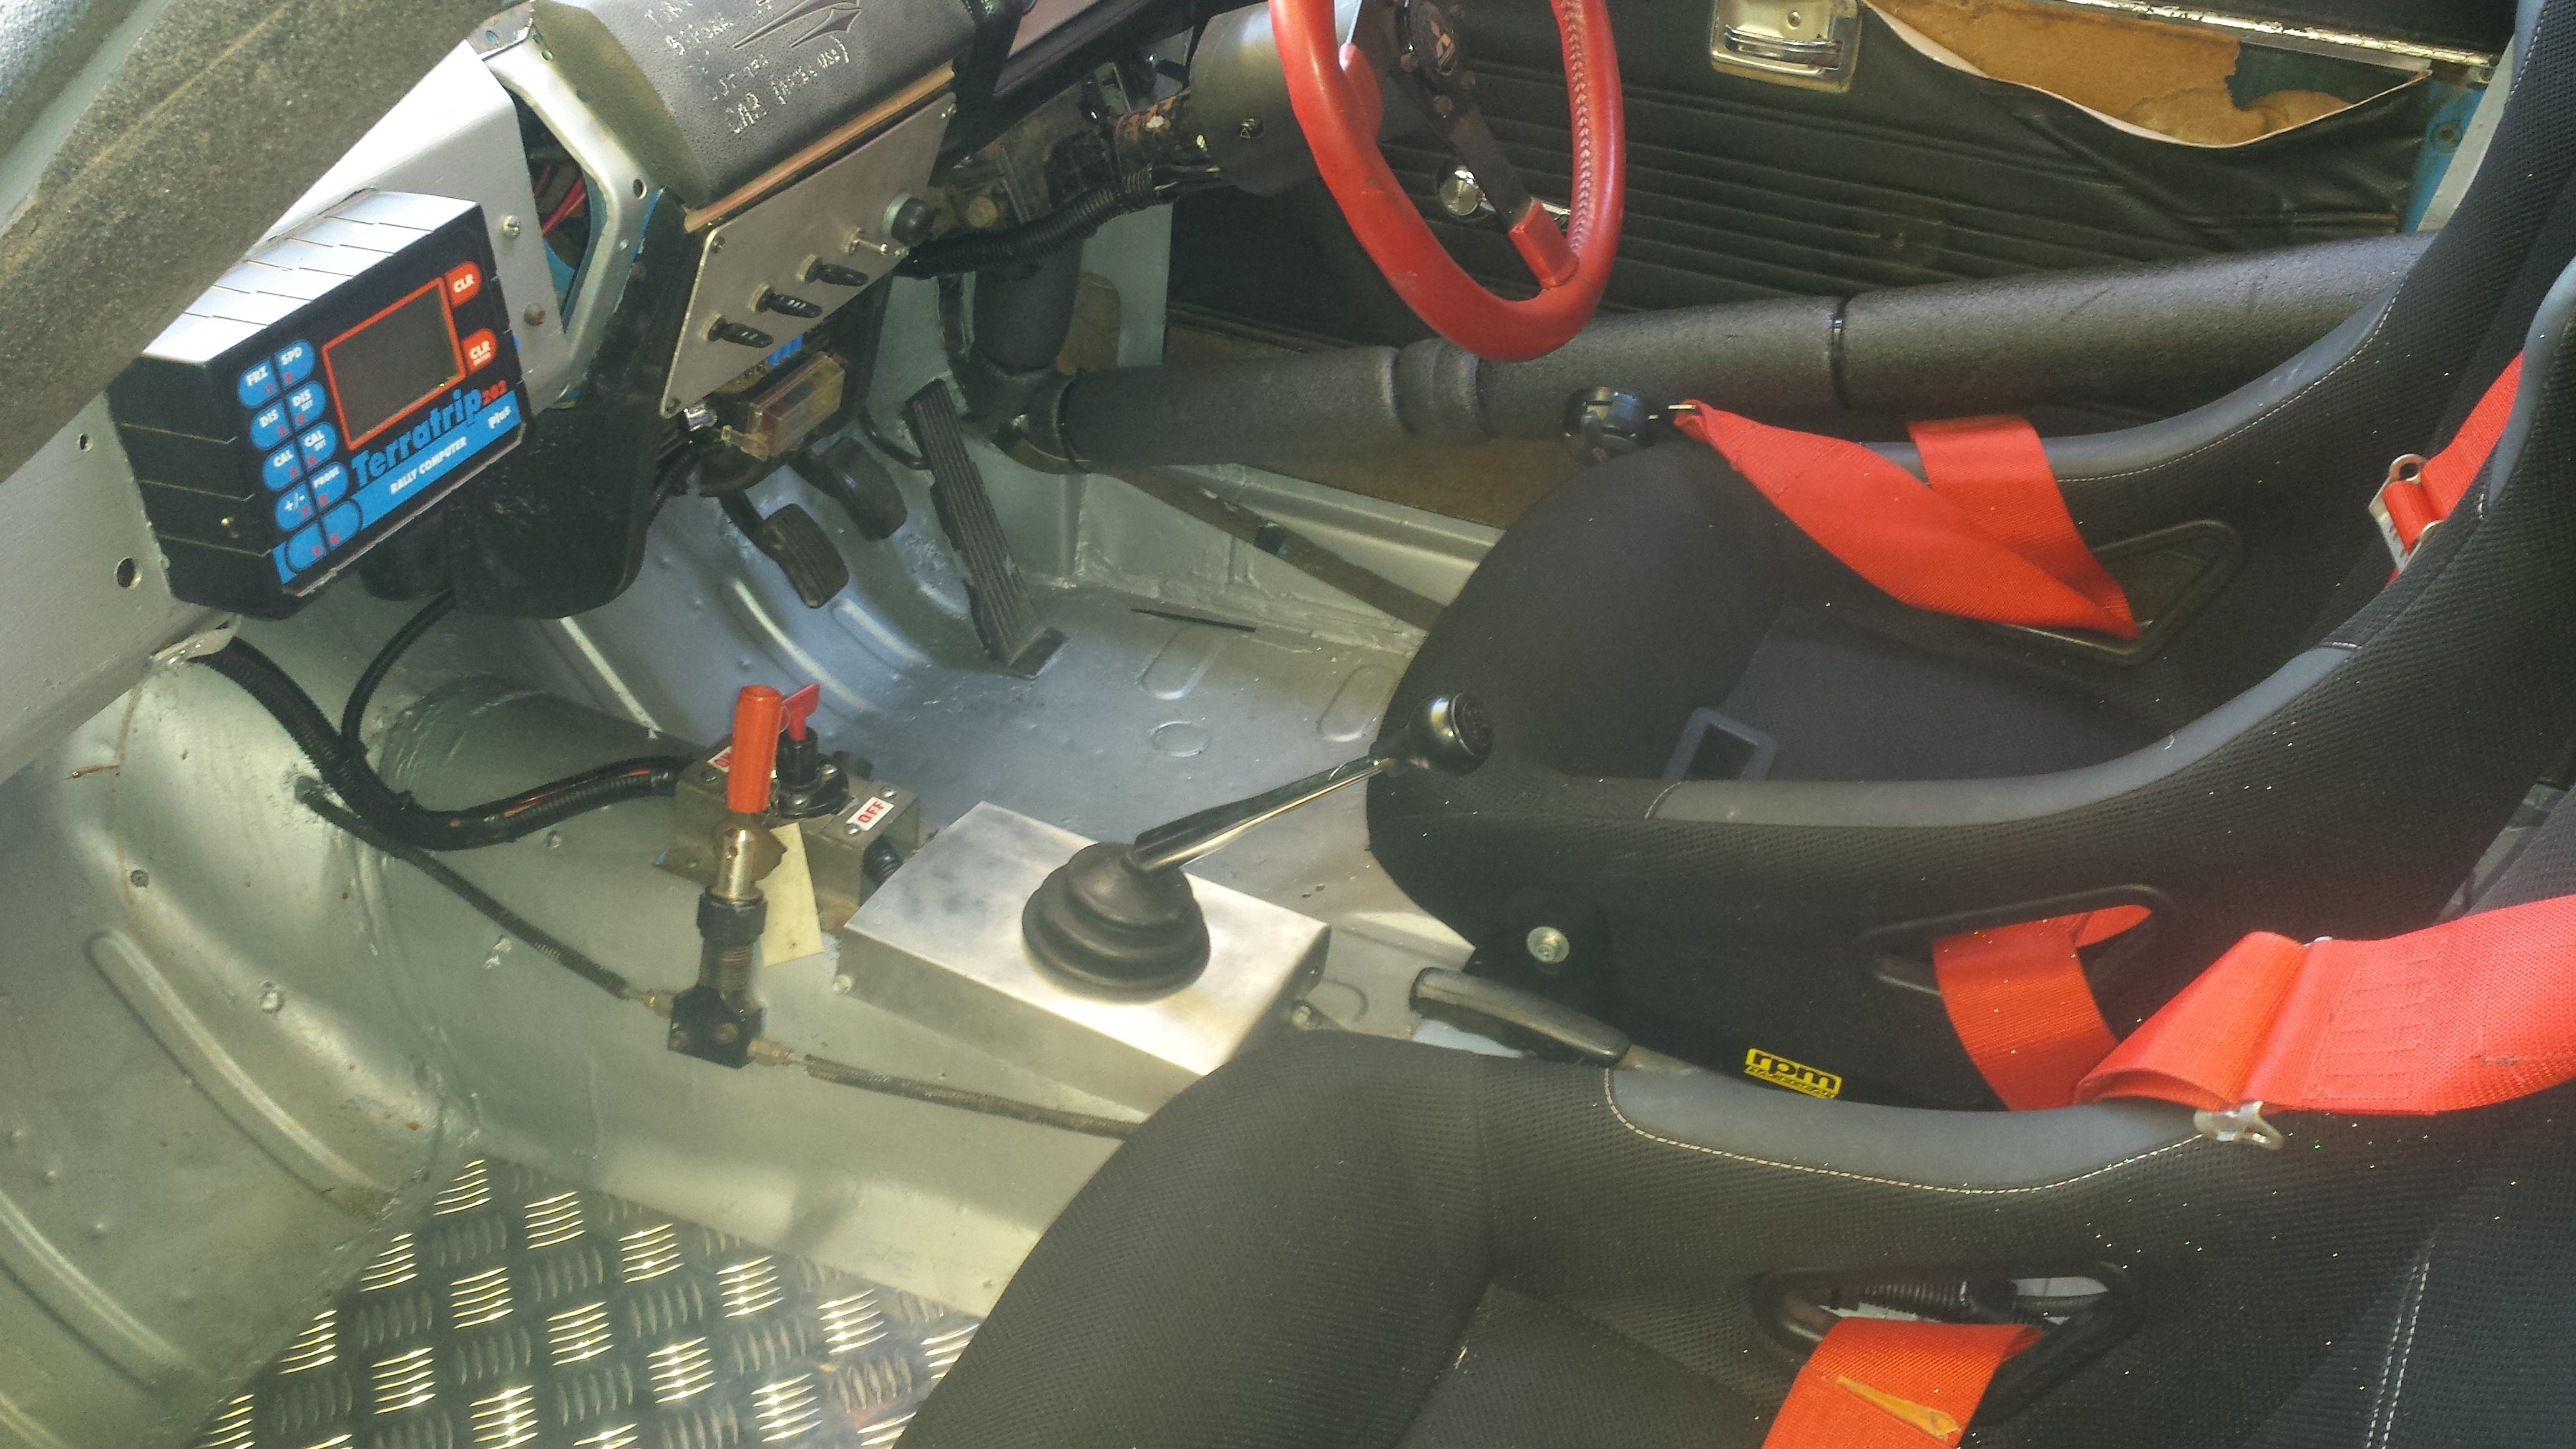
From the outset we knew we couldn’t trust the 44 year old standard gauge cluster and the aftermarket gauges fitted around the cockpit also looked dubious. The decision was made to remove everything, dismantle the standard dash binnacle and mount new gauges and warning lights in place of the standard cluster. A few hours of fabrication and wiring now give the driver a much better idea of what’s going on under the bonnet and put everything in the one place.
Simultaneously with the wiring, the interior was tackled. New chequer floor plates and an aluminium gear shift cover were fabricated. The rally computer, in this case a Terratrip was re-mounted and a new LED map reading light found its way into the co-drivers’ side.
Before bolting everything back together, the interior was given a couple of good coats of silver paint to tidy it and provide a more neutral colour. During re-assembly the Cobra race seats that arrived with the car were retained, however the old 4 point race harnesses were swapped with safer 6 point units. As it turned out, the correct roll cage padding came with the car so it was all re-fitted as one of the last steps.
 With the interior and electrics vastly improved, attention turned back to the engine bay for the all important “first fire up”. This would be the moment of truth to see whether everything was right.
The engine was wound over first by hand and then on the starter to get the oil pressure up before the ignition switch was flicked. With the battery connected and the fuel pump priming, the owner stood by nervously to see how his handy work would go. A couple of quick pumps of the throttle, and the engine fired up on the first crank. It was only a few seconds of running, however it was enough to confirm everything was right.
We soon found the Redline adapter plate on the carb wasn’t sealing as well as it should so a removal and re-fit with some fuel proof gasket maker eliminated the air leaks. Once warmed up, the carb was adjusted and the timing set conservatively for some easy run in miles to bed in the new rings and bearings.
Next post will cover testing and exterior works.
If you’d like advice or assistance in building your own competition car, click here.


